
Free Shipping over 80£ - 2 days delivery 🇬🇧
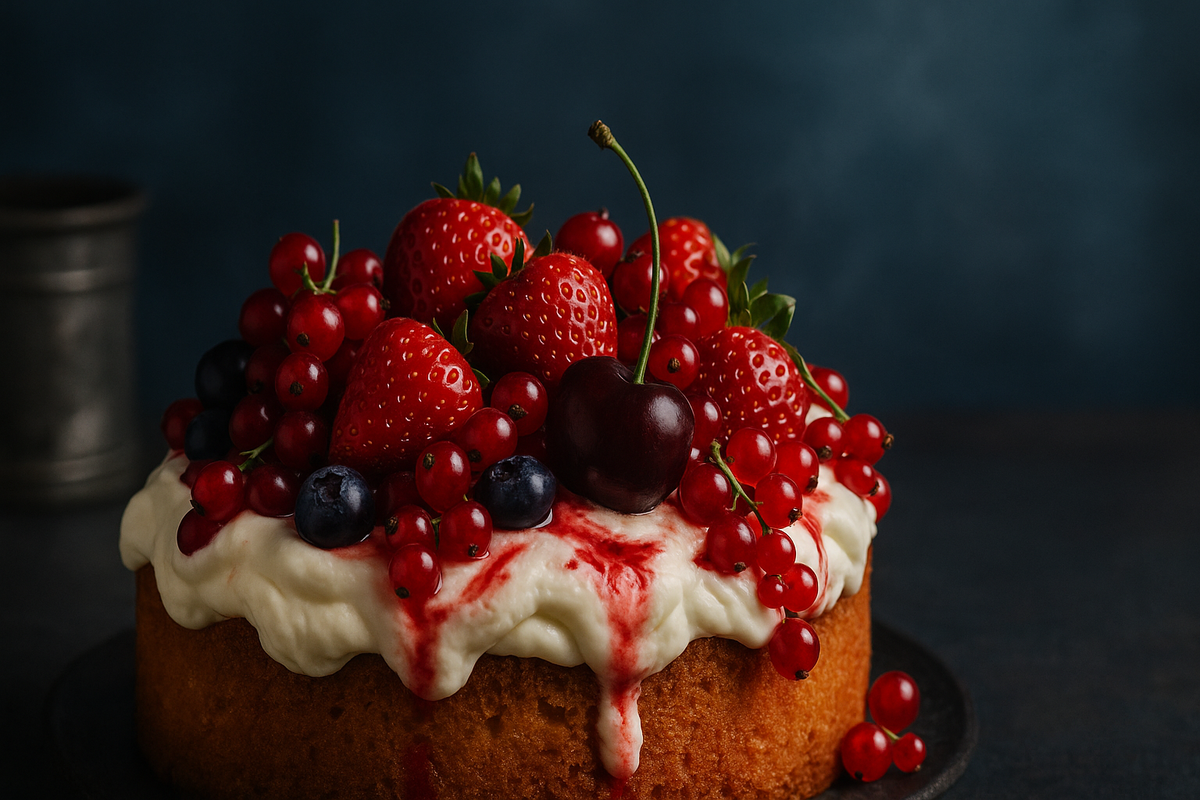
Have you ever found yourself pausing before a meal—not to say grace, but to get just the right angle of that glorious plate in front of you? Whether you're traveling the globe or just plating up at home, food photography is more than a trend—it’s a joyful way to share stories, cultures, and yes, cravings.But taking truly mouthwatering photos takes more than snapping whatever’s on your plate. It’s about light, color, composition, and emotion. This guide will walk you through the essentials of capturing food that looks as good as it tastes—without needing a studio or fancy gear. Just curiosity, creativity, and maybe a bit of appetite.

Color is your first impression in food photography. Ever noticed how fresh greens, fiery reds, or golden browns instantly make a dish feel more vibrant—or more comforting?
Use color intentionally:
You’re not just photographing food—you’re painting with flavor.

Lighting can make or break a food shot. The goal? Keep things natural and flattering. The harsh overhead lights in your kitchen might not do that lasagna any favors.
Try this:
Light should enhance, not overpower. You want the food to look fresh, real, and eat-me-now delicious.

Think of your photo like a tiny stage. The plate is your star, and everything else—cutlery, napkins, hands, ingredients—are supporting actors.
Tips for creating a strong composition:
You want to invite the viewer into the scene—make them feel like they’re about to take that first bite.
Not all food looks good from the same angle. A tall burger? Shoot it from the side. A pizza? Overhead, please. Finding the right perspective helps your dish look its absolute best.
Here’s a cheat sheet:
Take a few from each angle and pick the one that makes your stomach growl the loudest.

Still shots don’t have to feel... still. One of the best ways to make food look mouthwatering is by showing action. Think syrup being poured, salt being sprinkled, or cheese pulling from a slice.
Try these movement tricks:
These moments invite your viewer to imagine tasting the photo. That’s visual storytelling at its most delicious.
Styling doesn’t mean overloading the frame with random props. It means telling a story. A wooden cutting board can say “rustic Italian.” A tiny espresso cup? “Chic Parisian café.”
Choose props that:
Less is more. Every item should add flavor to the story you’re telling.
Good editing enhances, not disguises. You don’t want your salad to look like a sci-fi fantasy (unless that’s your thing). Subtle edits can elevate an image without taking away its soul.
Here’s a light edit recipe:
Apps like Lightroom, Snapseed, or even your phone’s built-in editor can do wonders—no Photoshop degree required.
Traveling and dining? Here are a few extra hacks:
And always, always take a bite after. You earned it.
At the end of the day, food photography isn’t about perfection—it’s about evoking emotion. That steamy bowl of noodles in Hanoi? That flaky croissant in a Paris café? That homemade birthday cake your partner made from scratch?
These are moments worth capturing. And remembering.
So don’t worry about having the best camera or perfect lighting. Just start where you are, shoot what you love, and have fun with it.

There's something deeply satisfying about a well-shot photo of a cold drink. Think frosted glasses, sparkling ice cubes, condensation beads sliding down the sides—all of it calling out, “refreshment.” Whether you're photographing cocktails, sodas, or iced coffees, capturing that crisp, cool feeling takes more than just a camera and a cold drink. It’s about planning, timing, and a touch of creative flair.
Ready to chill your shots to perfection? Let’s dive in.
When photographing cold beverages, the real magic starts before the drink even hits the glass. A little preparation goes a long way in capturing that fresh, icy look.
A well-staged setup makes the real beverage moment easier—and far more photogenic.
Professional food photographers don’t wait until the real drink is poured to get everything right. They use test liquids—like tinted water or iced tea—to set lighting and composition ahead of time.
This trick buys you time:
This simple prep step removes the pressure—and often improves the outcome.
Lighting is key to making cold drinks look crisp and irresistible. The best light feels natural but dramatic—like sunlight glancing through a lemonade at golden hour.
Here’s how to get it:
Want extra sparkle? Tilt the drink slightly toward the light or use a white bounce card to reflect soft light into the shadowed side.
Let’s be honest: real condensation disappears fast. To keep that frosty look going through a long shoot, many photographers use a little behind-the-scenes magic.
Try this:
With these tricks, you can take your time and still capture that “just poured” vibe.
Different drinks call for different points of view. The best angle shows off the drink’s personality—its height, texture, and garnish.
Here are some go-to options:
Try a few different angles until the drink feels alive on screen.
The drink is the star—but the supporting cast matters, too. A few well-chosen props can elevate your shot from basic to magazine-worthy.
Remember: less is often more. Let the drink breathe.

Cold beverage photography is about more than the drink—it’s about the feeling it evokes. A sparkling soda on a summer day. A frothy cold brew in the morning light. A mojito garnished with lime and fresh mint on vacation.
These are more than just photos. They’re tiny, visual invitations to pause, sip, and savor. So whether you’re shooting for Instagram, a client, or just for fun—prep your glass, chase the light, and freeze the moment. One chilled frame at a time.

Explore the fundamental principles of photography and become a more confident and skilled photographer.

Learn how professional travel photographers prepare for and complete exciting worldwide travel adventures.

Learn from leading night photographers about the equipment and techniques used to create captivating images of the night sky and urban scenes.

Learn the techniques, tools, and tricks used to create mouthwatering images.